Create Your Own VPN Server in Aws ☁
A simple detail guide to build VPN server in amazon's ec2 service

So before we begin we will understand what VPN is and why you should start using it.
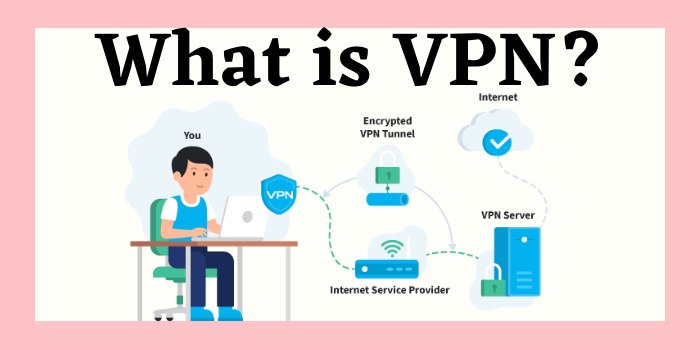
A VPN, or Virtual Private Network, allows you to create a secure connection to another network over the Internet. VPNs can be used to access region-restricted websites, shield your browsing activity from prying eyes on public Wi-Fi, and more. They originally were just a way to connect business networks together securely over the internet or allow you to access a business network from home.VPN essentially forward all your network traffic to the network, which is where the benefits – like accessing local network resources remotely and bypassing Internet censorship – all come from. Most operating systems have integrated VPN support.
How does it work? 😀 🤔
In very simple terms, a VPN connects your PC, smartphone, or tablet to another computer (called a server) somewhere on the internet, and allows you to browse the internet using that computer’s internet connection. So if that server is in a different country, it will appear as you are coming from that country, and you can potentially access things that you couldn’t normally.
So how does this help you? Good question! You can use a VPN to:
- Bypass geographic restrictions on websites or streaming audio and video.
- Watch streaming media like Netflix and Hulu.
- Protect yourself from snooping on untrustworthy Wi-Fi hotspots.
- Gain at least some anonymity online by hiding your true location.
- Protect yourself from being logged while torrenting.
So I thought how hard can it be to set up a VPN server I found out you could easily do this on AWS (Amazon Web Services) for free using OpenVPN. I started setting it up and a couple of mins later I had it up and running.
*OpenVPN is a popular open-source tool that is well tested and gives you a production-ready VPN solution. 🌏*
AWS console
Note: if you don't have an account on AWS (amazon web services), go ahead and create one it's free for one year you won't be charged until you exceed the usages, but you will need to have your credit card info handy. once you signed up, log in and under the services menu search for EC2 (you can type and it will filter the services as you type).
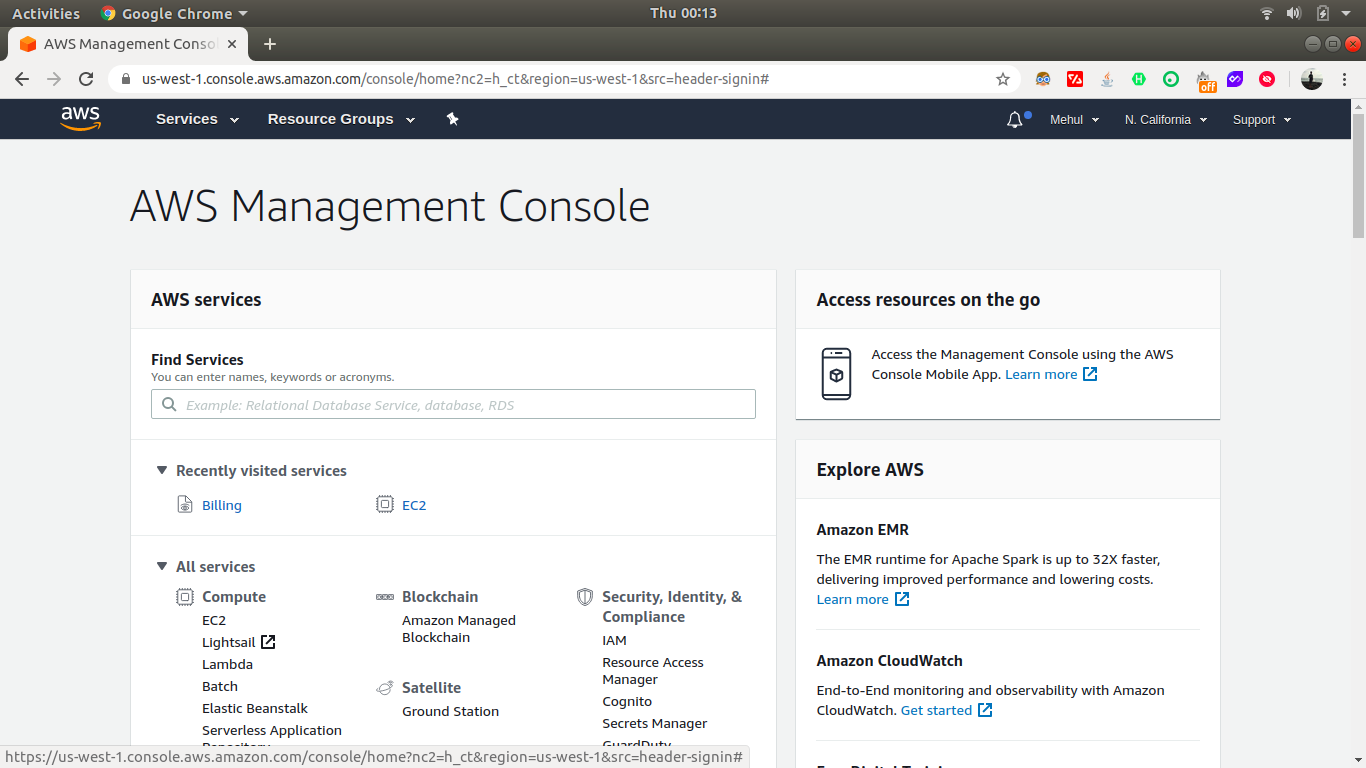
Click on EC2 and you will be redirected to its dashboard. Click the launch instance button under create instance section.
Select the OpenVPN
In the dashboard, click the AWS Marketplace menu from the left and type OpenVPN, then press enter.
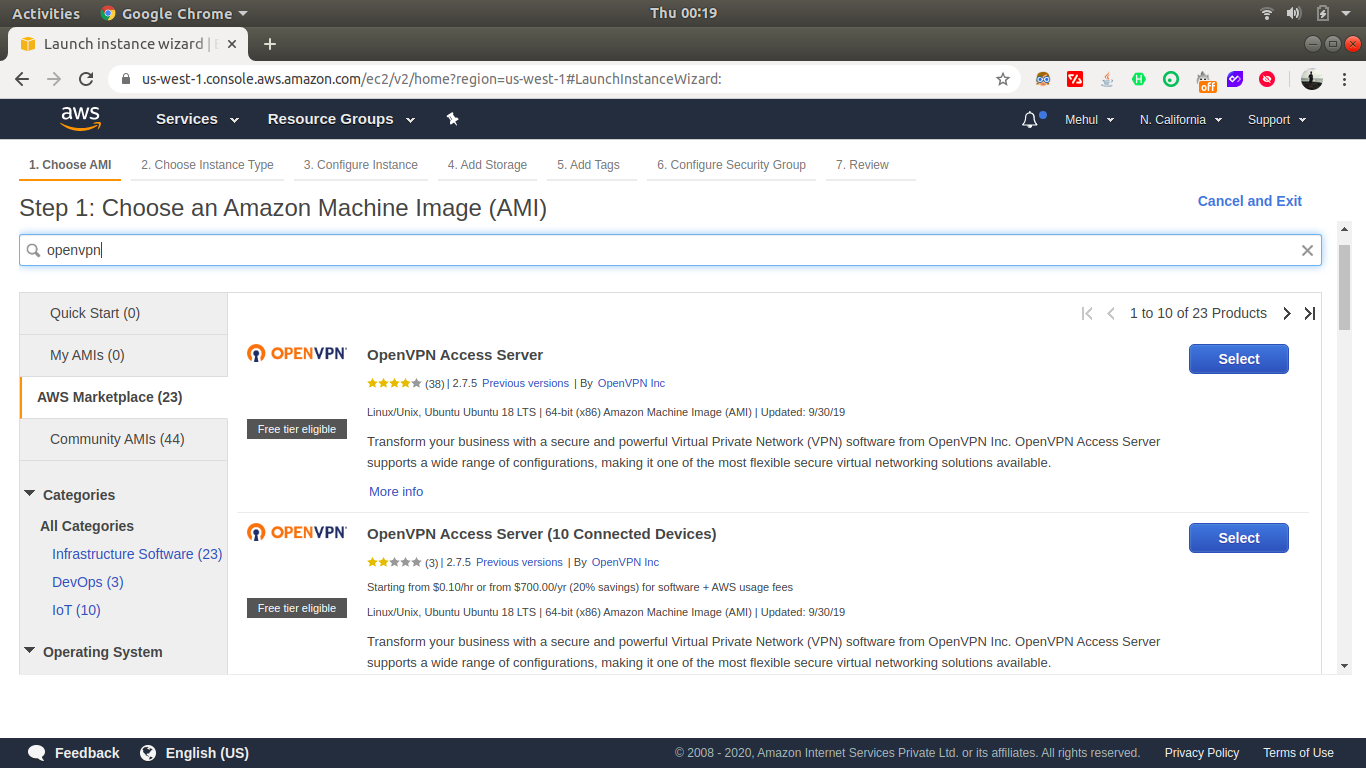
Click on the select button on the first one with the free tier eligible badge.
Selecting instance type
On the next page, click continue and select t2.micro from the instance type list.
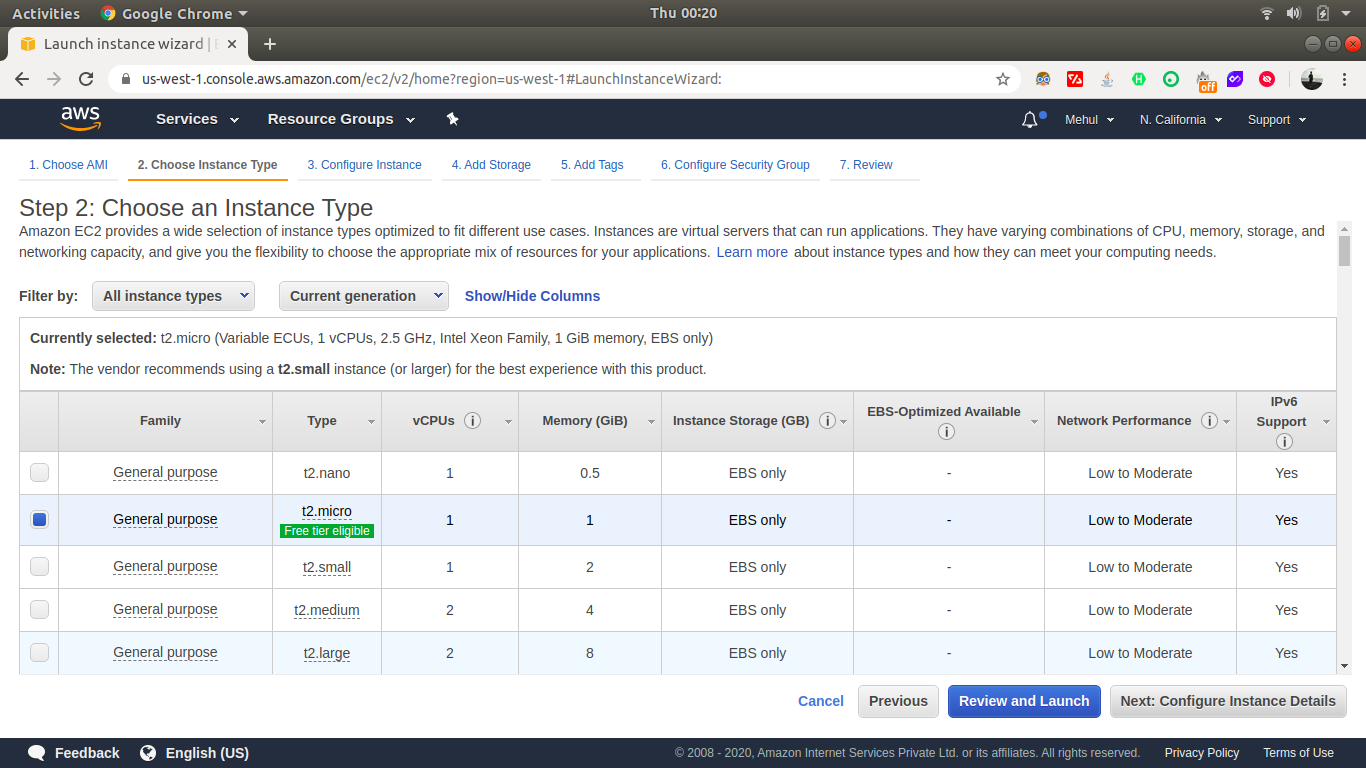
make sure you allow protocols rules as per your choice
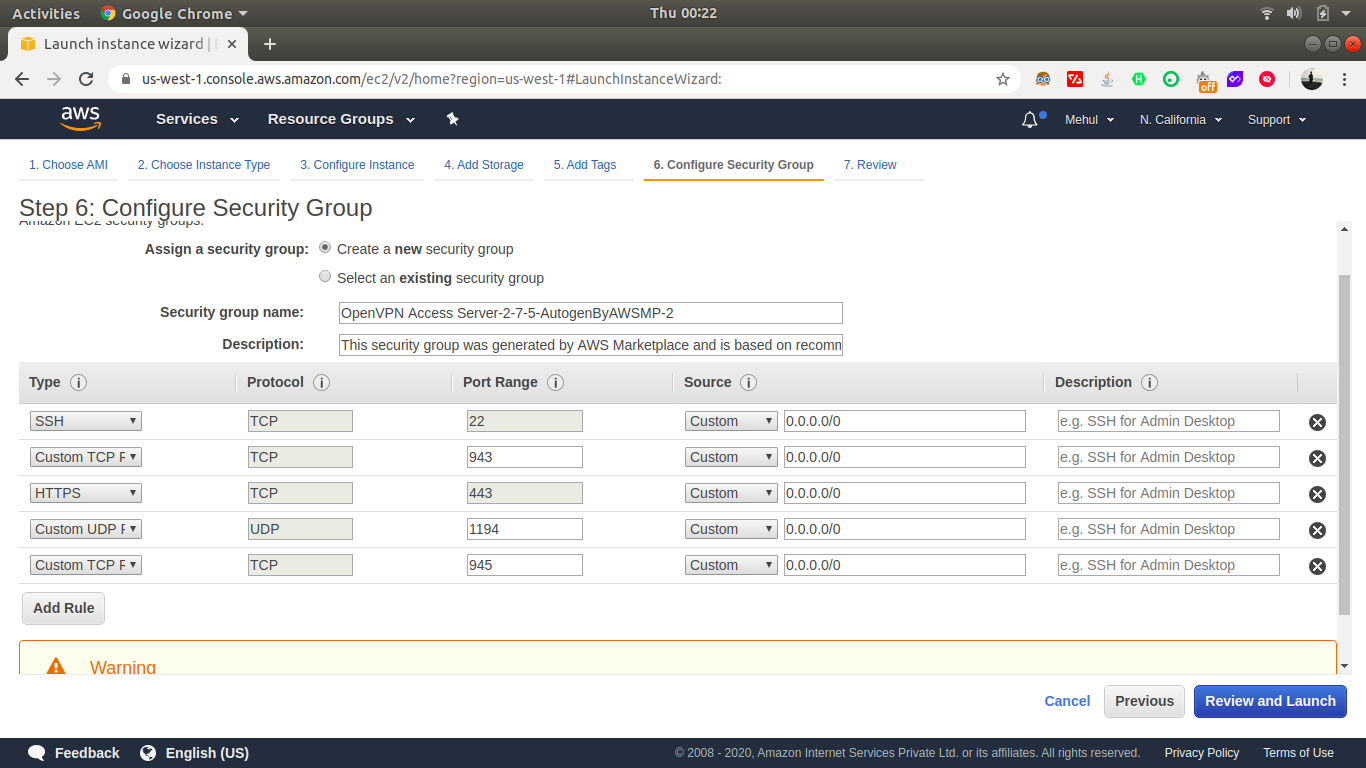
At this stage click on Review and Launch button.
Launch the instance
Select general purpose SSD from the pop-up and click next. Now click Launch and you'll see a pop-up asking you to select a key pair. This is to let you access the instance later on.
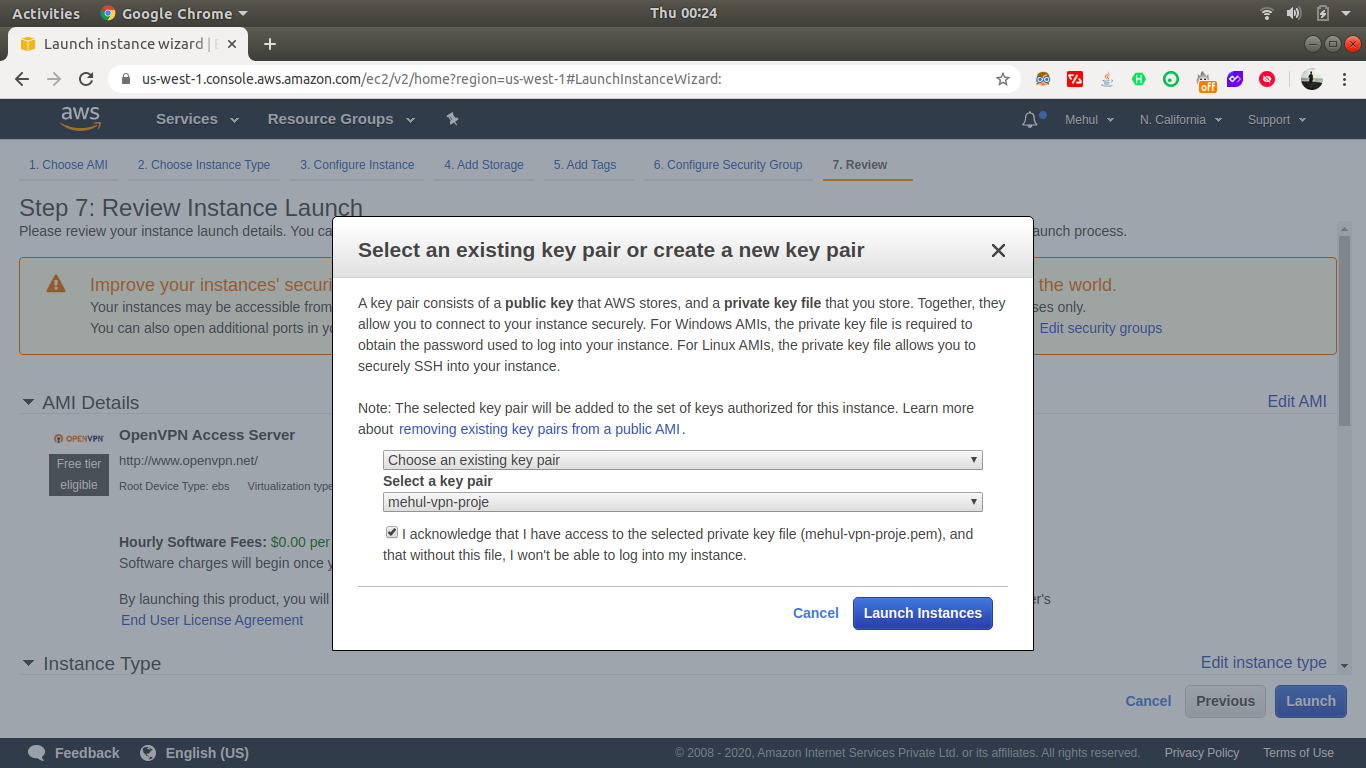
Select create a new key pair (or an existing one if you already have one), enter a name, and click download key pair. Save the .pem file somewhere safe as this is like a back door to your server 😄. Click Launch Instance and wait for the instance to go to running state.
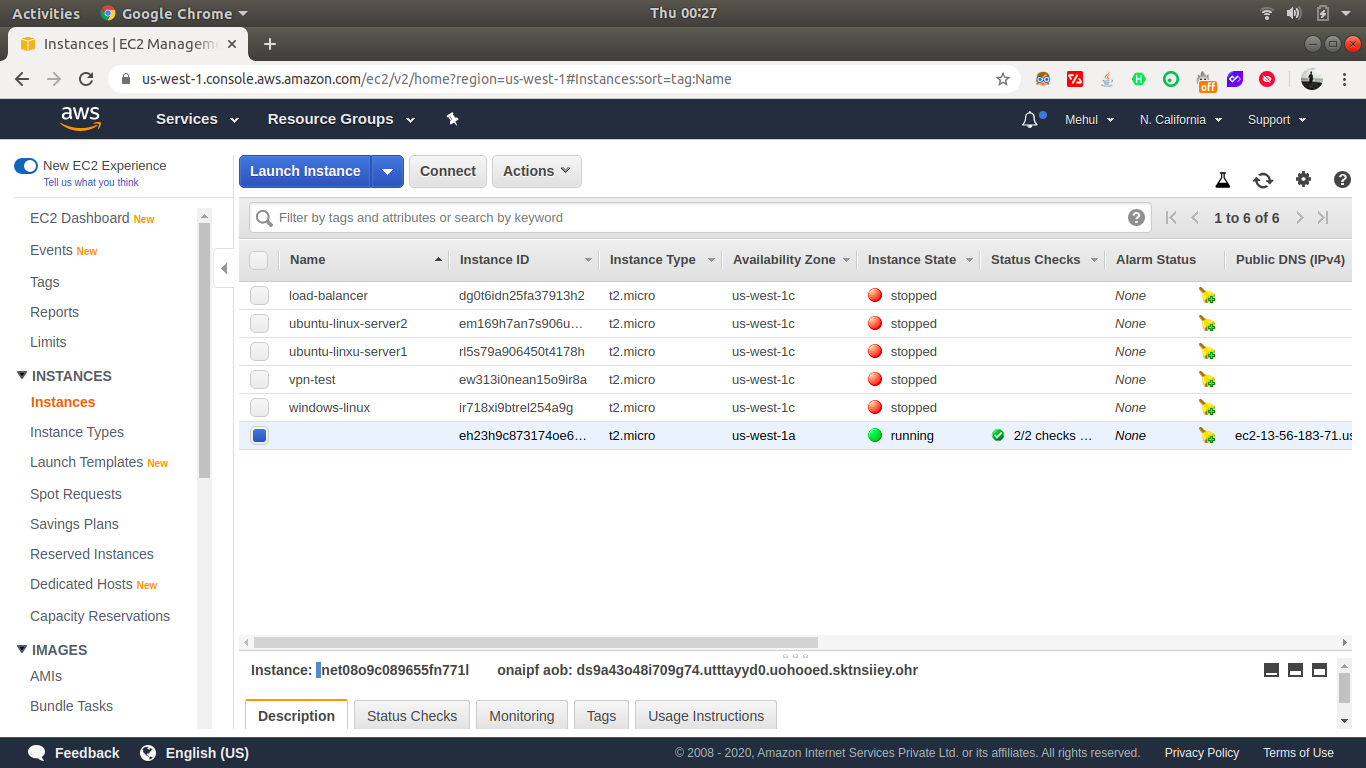
Select your instance and click connect.
SSH Into Your Ec2 Instance
You'll see a set of instructions on a popup on how to connect to your instance. I am using Ubuntu OS, Otherwise you can use PuTTY on Windows/Mac or even the web browser. Before we do anything we need to set the permissions for our private key 👉🏽 .pem 👈🏽 file, otherwise, it wouldn't allow you to connect. If you're using a Linux or Mac machine, simply run the following command:
sudo chmod 600 ~/your-pemfile.pem
Once that's done, open a command prompt, type bash and then enter the following command:
SUDO SSH -I "{NAME-OF-FILE}.PEM" OPENVPNAS@{SERVERADDRESS}.COMPUTE.AMAZONAWS.COM
(SERVERADDRESS is your Public IP of your EC2)
Don't forget to replace the file name with whatever you've chosen previously and replace the name of the server with what you got from the instruction popup.
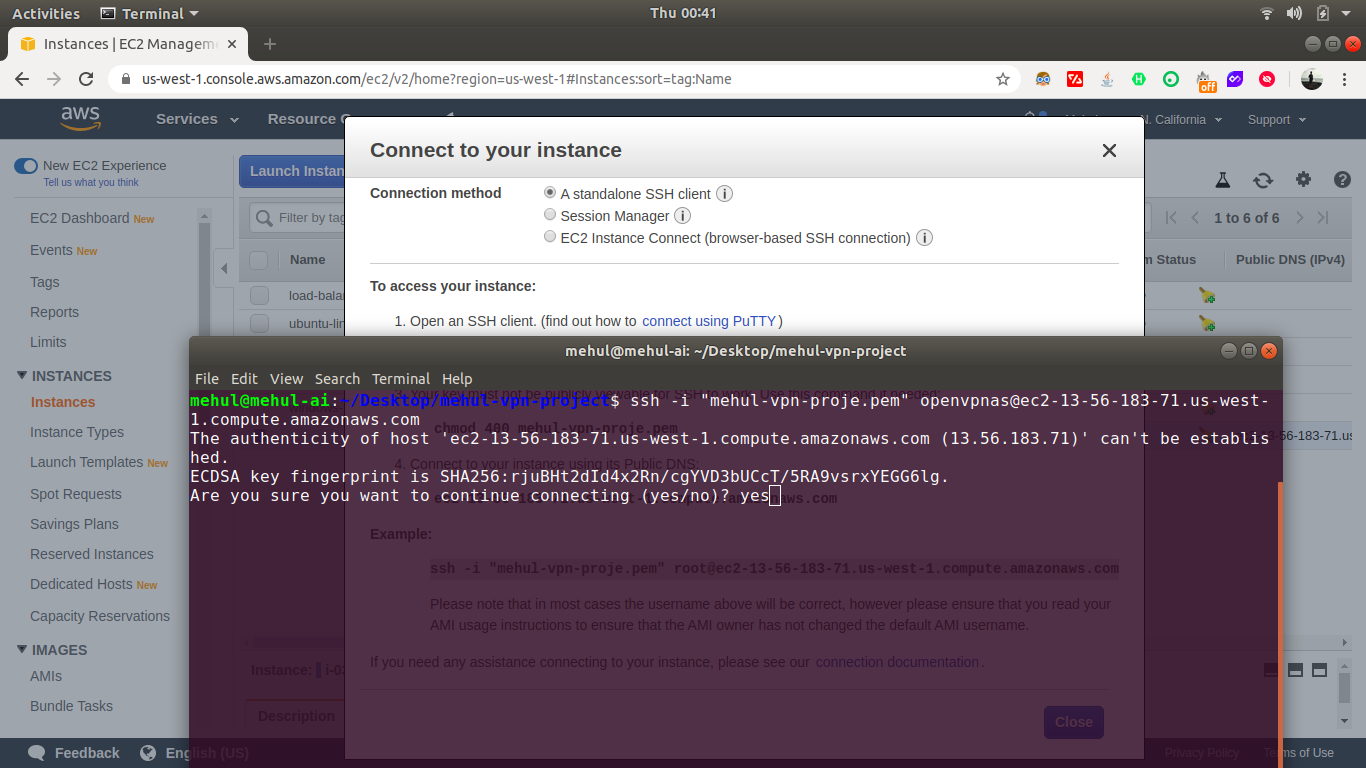
Type yes for the agreement, then just hit enter to have all the defaults confirmed. Once you reached to the end, change the password for the user which will be used to login:
sudo passwd openvpn
Enter a new password twice and you're all set. Open a browser window and type https://{server address}:943/admin and login with openvpn and the password you just set.
Finish up a few settings
Once you get into the admin dashboard of OpenVPN, click configuration and apply the following changes:
- Change the toggle for "Should client Internet traffic be routed through the VPN? to" Yes
- Change the toggle for Have clients use specific DNS servers to Yes-
- Select custom DNS server and set the first box to 1.1.1.1 (CloudFlare DNS 🦄) and the second to 8.8.8.8
Now save the settings, wait for the pop-up on the top and click apply the changes to server.
You're good to go 🏆
You're all set. You can now connect to your very own VPN server and enjoy a private surf of the net 😎. On the first page of the browser window you opened earlier, there are five options to download the OpenVPN client for different platforms. If you click on windows, you will get an installer with your server address pre-configured. Just enter your user name and password and boom.
You can connect to the mobile also just passed the OVPN key to OpenVPN mobile app and set the configuration and there you go.. for more info about connecting to mobile read it on OpenVPN client how to connect OpenVPN to the mobile.

